Registering our bot
Before we start making our bot, we need to register it for Discord. We do that by going to the Discord Developers applications page and creating a new application.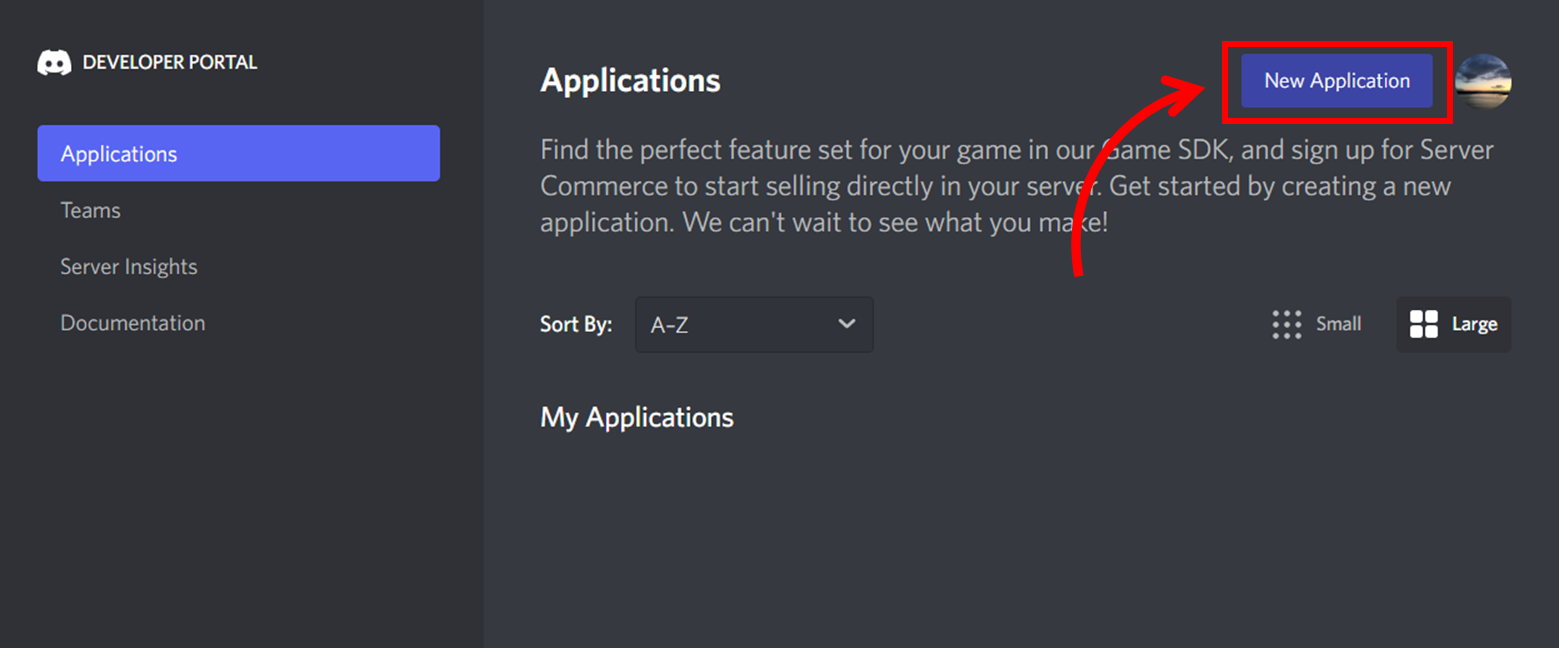
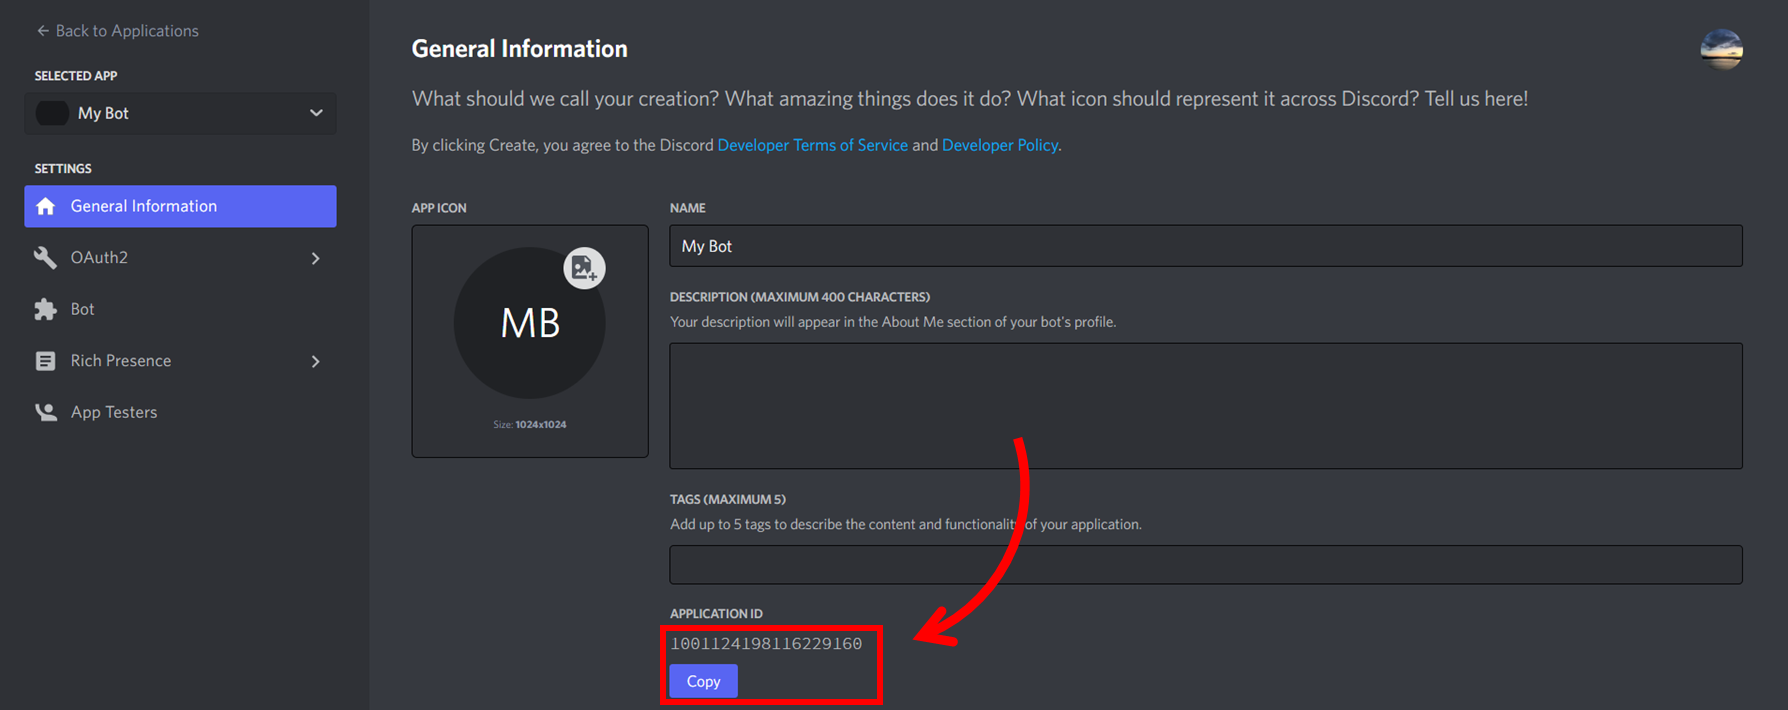
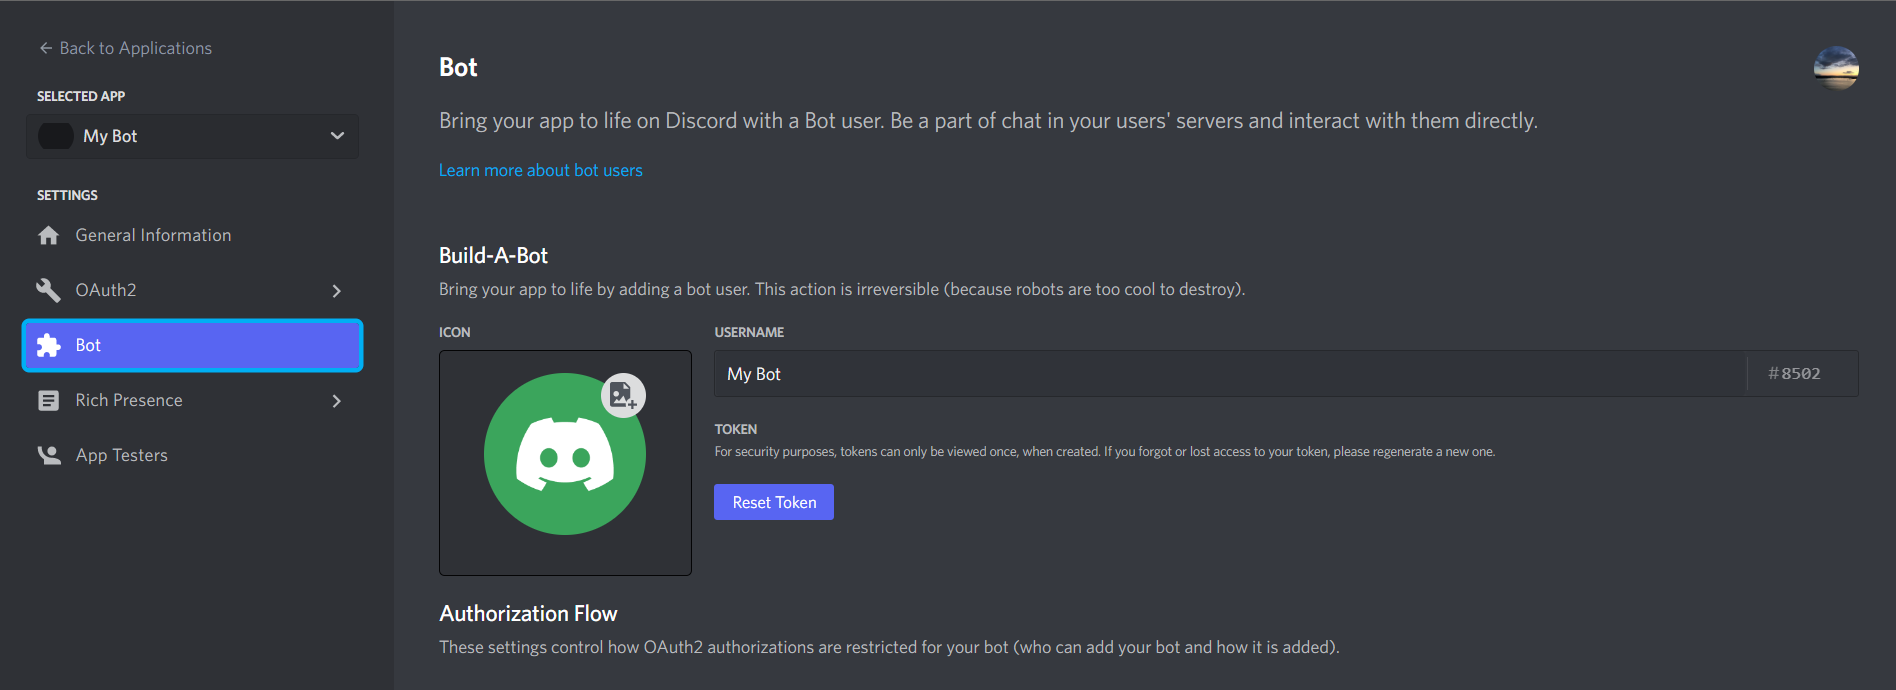
<application_id> in the URL with the ID you copied beforehand):
permissions=8 so that it can do everything on the
server. If you are adding to another server, select only the permissions it
needs.
We now have a bot on our server:

Getting a bot online
At this moment, our bot is not running because there is no code. We will have to write it and run it before we can start interacting with it.Serenity
Serenity is a library for writing Discord bots (and communicating with the Discord API). If you don’t have Shuttle yet, you can install it withcargo install cargo-shuttle. Afterwards, run the following in an empty
directory:
src/main.rs:
src/main.rs
Building an interaction for our bot
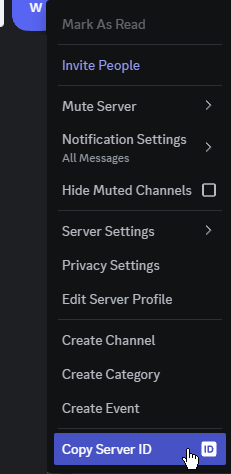
We want to call our bot when chatting in a text channel. Discord enables this with slash commands. Slash commands can be server-specific (servers are named as guilds in Discords API documentation) or application specific (across all servers the bot is in). For testing, we will only enable it on a single guild/server. This is because the application-wide commands can take an hour to fully register whereas the guild/server specific ones are instant, so we can test the new commands immediately. You can copy the guild ID by right-clicking on the icon of the server and clickCopy Server ID
(you will need developer mode enabled to do this):
async fn message hook as we won’t be using it in
this example, and then configure the gateway intents to not use any, as we won’t be needing them.
src/main.rs
ready hook we will call set_commands to register a command with Discord.
Here we register a hello command
with a description and no parameters (Discord refers to these as options).
src/main.rs
If you are working on a larger command application, poise (which builds on Serenity) might be better suited.With our command registered, we will now add a hook for when these commands are called using
interaction_create.
src/main.rs
Trying it out
Now with the code written we can test it locally. Before we do that we have to authenticate the bot with Discord. We do this with the value we got from “Reset Token” on the bot screen in one of the previous steps. To register a secret with Shuttle we create aSecrets.toml file with a key value pair:
Secrets.toml


Making the bot do something
There are public APIs that can be used for getting information on a variety of topics. For this demo, we are going to build a bot that gives a forecast for a location. I used the AccuWeather API for this demo. If you are following this tutorial 1:1 you can go and register an application to get an access key. If you are using a different API this is still the sort of process you would follow. To get a forecast using the API requires two requests:- Get a location ID for a named location
- Get the forecast at the location ID
cargo add reqwest -F json and deserialize the results
to structures using serde, with cargo add serde. We will then have a function
that chains the two requests together and deserializes the forecast to a
readable result.
You can skip some of the boilerplate by using direct access on untyped values. But we will opt for the better strongly typed structured approach.Here we type some of the structures returned by the API and add
#[derive(Deserialize)] so they can be decoded from JSON. All the keys are in
PascalCase so we use the #[serde(rename_all = "PascalCase")] helper attribute
to stay aligned with Rust standards. Some are completely different from the Rust
field name so we use #[serde(alias = ...)] on the field to set its matching
JSON representation.
src/weather.rs
The above skips a lot of the fields returned by the API, only opting for the ones we will use in this demo. If you wanted to type all the fields you could try the new type from JSON feature in rust-analyzer to avoid having to write as much.Our location request call also fails if the search we put in returns no places. We will create an intermediate type that represents this case and implements
std::error::Error:
src/weather.rs
async function that, given a
place and a client, will return the forecast along with the location:
src/weather.rs
reqwest client and a place,
we can wire that into the bots logic.
Setting up the reqwest client
Ourget_forecast requires a reqwest Client and the weather API key. We will
add some fields to our bot for holding this data and initialize this in the
shuttle_runtime::main function. Using the secrets feature we can get our
weather API key(we will also move the guild ID to the secrets file):
src/main.rs
Registering a /weather command
We will add our new command with a place option/parameter. Back in theready
hook, we can add an additional command alongside the existing hello command:
src/main.rs
src/main.rs
Running
Now, we have these additional secrets we are using and we will add them to theSecrets.toml file:

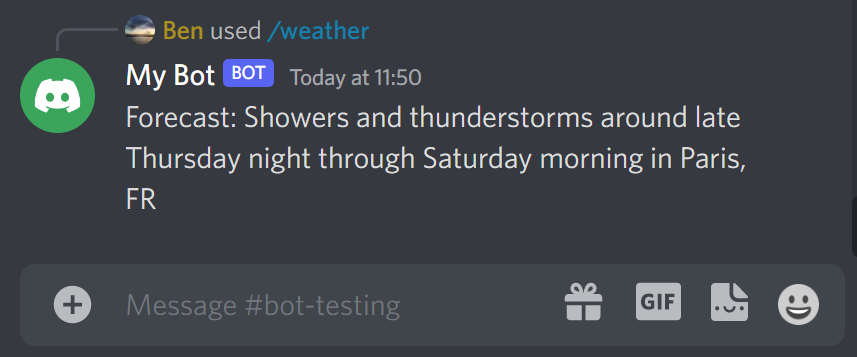
get_forecast function:

Deploying on Shuttle
With all of that setup, it is really easy to get your bot hosted and running without having to run your PC 24/7. Just write:- Use a different API, to create a bot that can return new spaceflights
- Maybe you could use one of Shuttle’s provided databases to remember certain information about a user
- Expand on the weather forecast idea by adding more advanced options and follow-ups to command options
- Use the localization information to return information in other languages

